The GUI (Graphical User Interface)
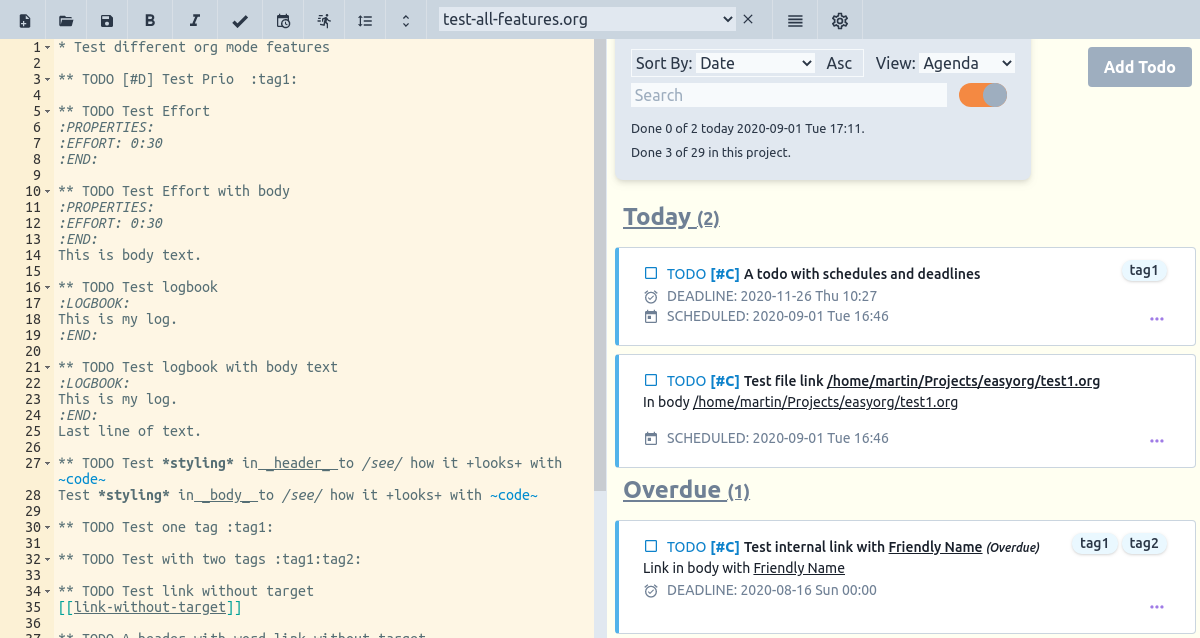
Any changes you do by using the GUI will be reflected in the text file. The GUI can be used as a complement to the editor or as a complete replacement. There is no need to use the editor in most cases.

Adding a TODO
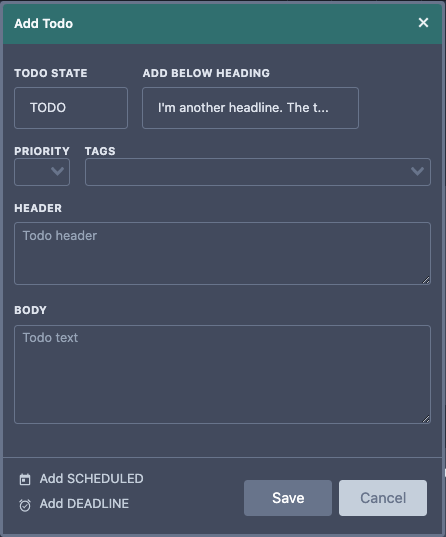
Instead of adding the TODO by writing text in the editor you can use the provided graphical user interface. In the upper right corner is a button called Add Todo which opens a form where you can input the Header and Body text.
You can select the TODO state using the state selector. You can also select under which Heading you want to place the new TODO once you hit the save button. The Heading selector is pre-populated based upon the Headings you already have in your file. The TODO will be placed as the first TODO just below the Heading.
You can also add SCHEDULED and DEADLINE timestamps.
In case you wrote some text and press cancel you will get a confirmation question to avoid accidental loss of the text you wrote in this window.

Editing a TODO
You can edit an existing TODO by clicking the three dots actions icon '...' on the TODO in the Agenda panel and select 'Edit' or you can dimply double-click on the Todo you want ot edit. A form is shown which lets you update the Header and Body text as well as the state. Clicking the Update button will save the changes in the text file. The Edit-form doesn't allow to change the Heading the TODO is filed under.
You can also update, add and remove SCHEDULED and DEADLINE timestamps.
In case you updated some text and press cancel you will get a confirmation question to avoid accidental loss of the text you wrote in this window
Moving a TODO to another Header
Open the Edit Todo window by either double clicking a task och selecting the 'Edit' menu option. From the Edit Todo window select the heading you want to move the task to under the 'Add Below Heading' select box.
Then click the 'Update' button and the task will be placed below the newly selected header in the document.
Deleting a TODO
From the TODOs Actions icon '...' in the Agenda panel, select 'Delete' to delete the corresponding TODO. A confirm delete message will be shown before it will be removed from the text file.
TIP. In case you want to undo a delete you can go to the editor and do a regular undo. Use Ctrl-Z or select Undo in the Edit menu.
Adding a DEADLINE or SCHEDULE
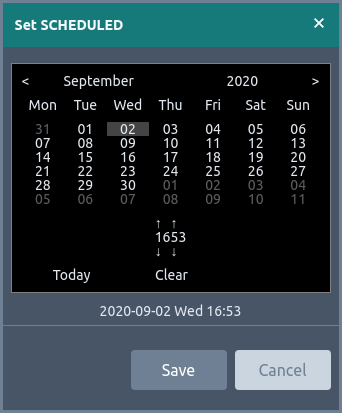
You can also add DEADLINE and SCHEDULE timestamps to a TODO without actually writing in the text file. From the Actions menu select 'Deadline* or 'Schedule' to open a Calendar pop-up. Select the date and then click 'Done' or outside the calendar to add the date.
This might cause the TODO to be moved out of view according to your selected view and sorting.

Removing a DEADLINE or SCHEDULE
To remove a DEADLINE or SCHEDULE, from the Actions menu select 'Deadline* or 'Schedule' marked in red and with a minus symbol. The DEADLINE or SCHEDULE will be removed.
This might cause the TODO to be moved out of view according to your selected view and sorting.
Updating a DEADLINE or SCHEDULE
You can update an existing DEADLINE or SCHEDULE by clicking on it in the Agenda panel. A calendar pop-up will be shown. Select a new date and then click 'Done' or outside the calendar to update the date.
Adding and Updating properties
From the Actions context menu in the Agenda select 'Properties' or click on the 'Properties' button from the Table view.
You can now add and update properties to your liking. By hovering over the little question mark you can see which Properties are already in use in the file. This helps you remember and also avoid adding similarly, but slightly differently named properties.
Use the Add/Edit window in parallel with the Agenda and Editor
Searching in the Agenda still works while the Add/Edit window is open. This is great if you need to refer to other data or Todos in your file while at the same time writing and updating a Todo.
The Editor is also available for review and search, however you cannot edit using the Editor while the Add/edit window is open.
In case the Add/Edit window is in the way, just drag it around.